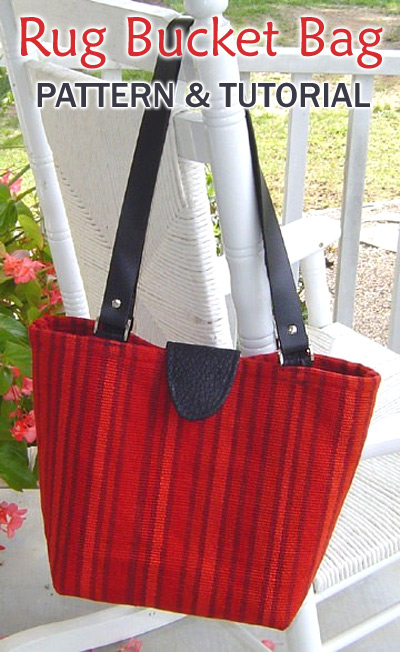

Made w/ a Home Depot basketweave rug Fringed ends, 40” X 20”

Fabric & Notions Supplies
• One set of 20” handbag straps with D--rings attached
rings attachedrings attached rings attached OR 50 inches of 1” wide nylon webbing plus four 1” D--rings
• One 4” X 7” piece of each of the following for the Flap:
imitation vinyl, fusible fleece & quilter’s cotton
• One 3/4” magnetic snap
• 12 inches of double-fold bias tape (extra wide)
A word about choosing & working with your woven rug-
A) It’s easier to use a woven rug w/ either finished or turned under edges, (like the Target rug), as opposed to one w/fringed edges, (like the Home Depot rug). The Home Depot rug was a LOT harder to work with, because of the thickness of the basket-weaved fabric. My machine handled it pretty good, but I can promise you that my Singer would not have.
B) The finished size of your tote will depend entirely on the size of your rug & the gusset depth you choose. The deeper your gusset width, the shorter and wider your finished tote will be.
Sewing Instructions
Flap Closure1) Center & fuse Flap Fleece to wrong side of Flap lining.
2) Center a mag snap BACK on right side of Flap lining, 2” above curved edge. Using metal snapback as a guide, mark slit positions on lining with a pen. Carefully cut thru fabric at slit marks.
3) Separate the 2 sides of the mag snap. Push prongs of the “male” side thru slits to fleeced side of Flap.
Place snap back over prongs & bend them to each side to secure mag snap in place.

4) Now place “snapped” Flap lining right sides together w/ Flap exterior, aligning raw edges & single notch. Stitch 1/4” from edges, leaving straight notched edge unstitched. Clip curves & trim seams to ~1/8”. Turn Flap right side out & press flat. Topstitch 1/4” from finished edges.

5) Center Flap right sides together, & 3/4” BELOW the short edge of your rug exterior. Stitch in place 1/4” from Flap notched edge

6) Press Flap UP & over rug edge. Stitch 1/4” from Flap pressed edge to conceal raw edges.
Attach Straps
If you have purchased handbag straps with D-rings, proceed to step 8.
7) Cut webbing into two 22” lengths. Sear all 4 cut edges to prevent raveling. Loop each webbing end thru a D-ring. Zigzag webbing in place to secure it.

8) Cut four 6” pieces of extra-wide double fold bias tape. Press each one open, revealing inner folds of tape.
Press over 1/2” (wrong sides together) at each end.
9) Now press each folded bias tape piece in half, then stitch close to all four edges to secure it all in place.

10) Loop a bias tape piece thru the D-ring of each Strap, folding bias tape in half. Baste edges to secure them.
11) Place each set of bias tape edges along an INSIDE top edge of rug, ~2.5” from either Flap side edge. Pin these edges in place so that ~ 3/8” of each bias tape loop is visible above the edge of the rug.

12) When you’re satisfied with the placement, stitch each set in place thru all layers of fabric. I recommend that you stitch more than one stitch line and that you liberally reinforce the stitching. (Remember, the entire weight of your tote bag will be concentrated on this stitching.)

Let's put it all together now
13) Fold Rug RIGHT sides together now, aligning side edges & top corners. Stitch 1/2” from both sets of side edges. The layers are quite thick at this point, so stitch slow and steady for best results.
Place pins at the bottom corners of what is now, the bottom edge of your bag.

14) With right sides still together, fluff bag OPEN.
Align each side seam with the pins along the bottom edge of bag, to form 2 triangular areas.
(The side seams on each side should be in the CENTER of each triangular area.)
Mark a spot ~2.5” down from the peak of each triangle.
Draw a straight line from this mark to the sides of both triangles.

15) Stitch along both of these lines, thru both layers of the rug bottom, to form a gusset for your bag bottom. Reinforce stitching at both ends. Do NOT cut away the fabric triangles!
16) Turn entire bag right side out now, & fluff it open. You’re almost done!
Bag Bottom Support

17) Cut a piece of firm cardboard, 12” X 3.5” in size.
Cover your cardboard with a fabric sleeve made from lining fabric. (I suggest cutting your fabric 14” X 14” to make this sleeve.) Place the covered cardboard in the bag bottom (under the fabric triangles), to keep your bag from sagging, no matter what your carrying.
You’re DONE! Enjoy your Rug Bucket!
rug fringe tutorial
There’s two different ways to handle rug fringe. (Assuming of course that the rug does not exceed the thickness constraints of your machine, as mentioned in the opening paragraph.)
A) Use it to your advantage! If the fringe is cool, turn it over to the right side of your rug, & stitch it in place there.

B) Get rid of it! You can zigzag stitch along the portion of the rug BEHIND the fringe to stabilize the area, then carefully trim the fringe away.
Now flip the rug’s cut edge of rug over to the wrong side the wrong side the wrong side the wrong side & stitch it in place.


No comments