
We had also brought home some uber touristy dream catchers from a trip to Sedona and they just didn’t fit into our design style!!! So it was time to make our own…here is what you’ll need:
Embroidery hoops
Washi Tape
Yarn in various colors
Feathers
Felt Balls
Beads
or anything else you can think of to decorate your DIY Dream Catcher!!

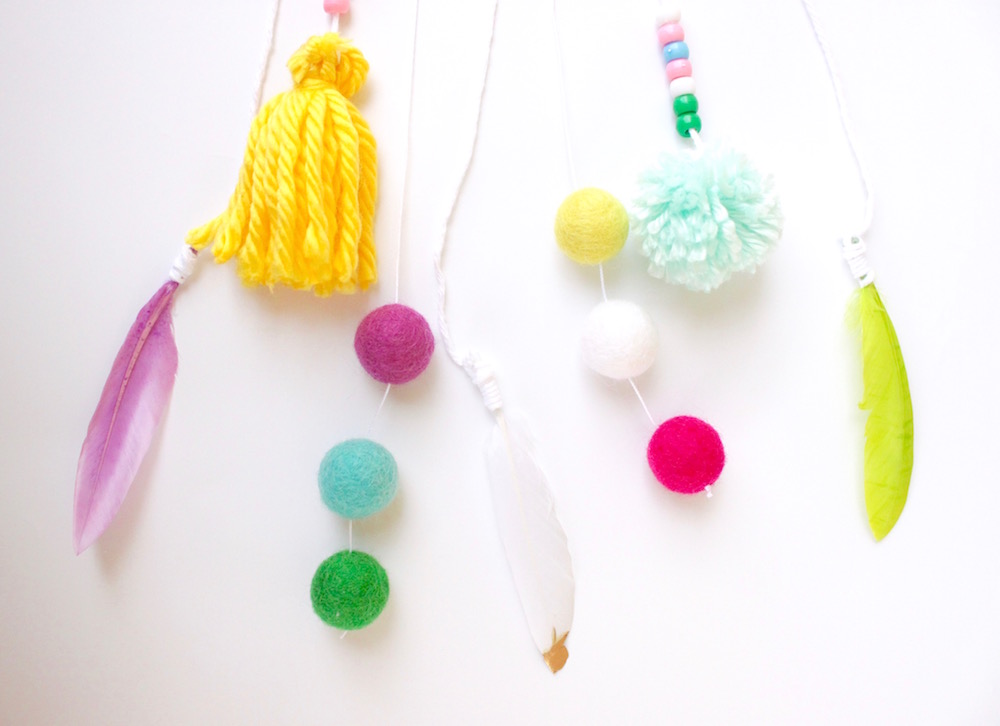
I first laid out all of the supplies and started letting my boys pic thru what they wanted on theirs. I then made some examples to give them some ideas. I started with the dangles…I used a variety of craft supplies and came up with what you see below…so fun, right???

Next, we covered the hoops is cut pieces of washi tape


This part was super easy for them to assist with. I precut a bunch of pieces and had them put them on in whatever order and colors they wanted. Then I started wrapping yarn around the outside of the hoop in a web pattern and tied it to secure it.

The next step was to tie on the dangles

I sew a felt heart for the sample dream catcher and thought it was such a cute addition.

Here is a close up…it is just a simple stitch to close it up filled with poly-fill to give in some dimension.

another close up of the dangles…
Here it is hanging up on the wall…I love the way it turned out!!


The next few pics are the dream catchers that my boys designed for themselves…I LOVE the color combos they picked. They were so proud of their designs…they couldn’t wait to go to bed to hang them up and see if they work!!!

Feeling inspired to make your very own DIY Dream Catchers?


No comments