
The Pouch is a fun sized pouch to make and use! You can also use it for small devices, stickers, marbles, pacifiers, rocks, snacks (in a ziplock), Poly Pocket and her accessories, small bouncy balls, lipstick, makeup, post-it notes, paper clips, candy, doggy clean-up bags and collectibles.
Materials:
4-Fabric scraps measuring 6”x6”
2-interfacing measuring 6”x6”
5”to 7” zipper
3”ribbon
Step 1: Gather some scraps of fabric and interfacing. Using the template cut out 2 main fabrics, 2 lining and two interfacing pieces. You will also need a piece of ribbon measuring 3” and a 5” to 7” zipper.
Step 2: Fuse the main fabric to the interfacing.
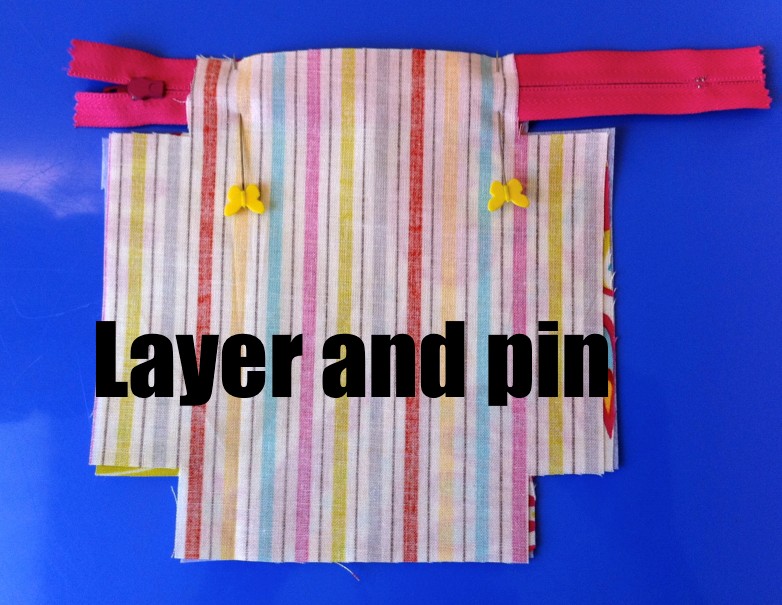
Step 3: Layer main panel right side up, zipper wrong side up and lining wrong side up. Pin all together.
Step 4: Using a zipper foot, sew the layers together.
Step 5: Press the fabrics away from the zipper
Step 6: Topstitch the edge of the main fabric to the zipper.
Step 7: Follow steps 3-6 for the opposite side of the zipper.
Step 8: Pin the main fabrics right sides together and the lining right sides together.
Step 9: Sew only the sides, make sure you leave a 2” opening in the lining, do not sew the corners.
Step 10: Pinch the bottom corners of the main fabrics together and pin. Then pinch the bottom corners of the lining together and pin.
Step 11: Sew the corners.
Step 12: Pinch the top corners together and pin. Sandwich the 3” ribbon in between the top of the zipper and main panel corner.
Step 13: Sew the last two corners altogether
Step 14: Cut excess fabric and zipper.
Step 15: Flip right side out, using a chopstick poke the corners.
Step 16: Iron the lining opening closed and sew. Congratulations! You have made a Pouch Cubed!


No comments